There was a time I encouraged everyone in my surroundings to learn Photoshop. Dreary idea.
Nowadays, I tell people to use PicMonkey, an online photo editor which is both fun and easy. Most of its core features are free too.
Let me run you through 8 photo editing steps that I usually do to all my photos.
After this lesson, and with a bit of trial and error, you’ll be able to go from this before:
To this after:

1. Level the horizon
It’s a relatively common error for amateur photographers to unintentionally tilt the camera, and get a slightly diagonal horizon.
Here’s how to fix it in PicMonkey:
2. Reframe your photo
Thankfully you get a second chance at framing a photo with an editor thanks to the crop tool.
For example, take this photo:
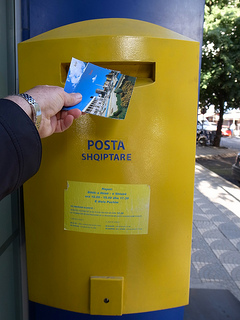
In this picture, I’m only interested in the main subject: the post cards. The tree, the sidewalk and the full post box, I can do without so my viewers focus on the main action:

It’s no coincidence that the crop tool is the first one at the top of the PicMonkey toolbar:
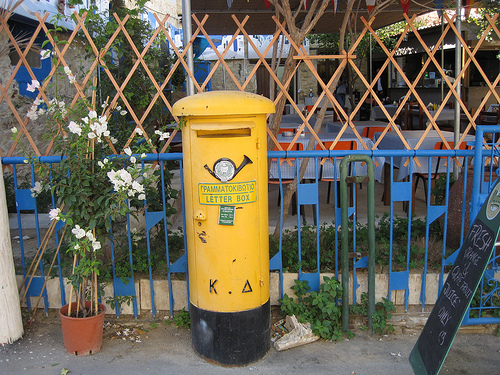
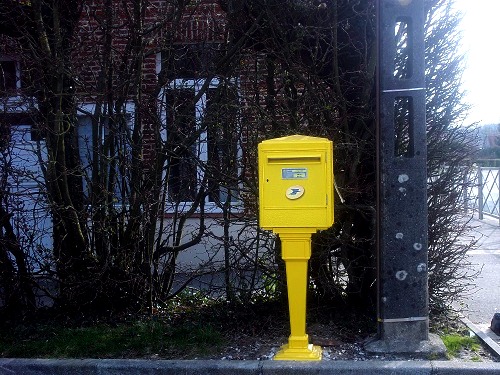
3. Don’t centre your subject
The first artistic rule in photography is the “rule of thirds,” a concept borrowed from painting.
In short, don’t center your subject. For the long explanation, read this nice article with examples.
Take this picture for example, with a centered mail box:
It now looks a little better after I cropped it and move the post box to the right:
4. Add contrast
I always play with the contrasts and brightness of each image. For example, this sun glared picture could use more contrast:
It looks a little better once we add contrast, and lower the brightness:
Look for the exposure tool in PicMonkey:
5. Filters, like in Instagram
PicMonkey offers nearly 30 free filters, some of which are reminiscent of Instagram.
A really plain photo, like this one:

… can suddenly have a different feel to it. I opted for a bit of vintage:

6. Add a frame
This is a must, especially for your newsletters with a lot of photos which in turn can start to look bland:
I prefer the pics with fat frames, like this:
In PicMonkey, stick to the first three types of frames:
7. Insert text!
This is to be used sparingly, since some of your subscribers won’t display the images in their email clients.
This said, it can really help attract your users attention, like this:
This sums it up! Of course, you can use the same tricks with other editing software like the free Picasa, or Aperture for Mac. Then again, PicMonkey is so much easier.