
The ubiquitous pop-up box. Are they an essential email marketing tool? Or a necessary evil? What’s the best way to use them?
In this post, we’re going to talk about pop-up boxes (also known as modals) and specifically, using a WordPress plugin called Holler Box to set them up on your website. Why Holler Box? In brief: because it’s super simple and only takes about 30 seconds to install and configure.
Why pop-up boxes?
Before we continue, you may wonder: why bother setting up a pop-up box in the first place? Aren’t sidebar and footer subscription forms sufficient? In short: it depends. Overall, pop-ups have excellent conversion rates – typically better rates than other types of forms. Pop-ups are especially useful for creating email courses or drip campaigns.
The results of using conversion-focused pop-ups can be compelling. The University of Alberta had witnessed an increase in newsletter sign-ups when they introduced the sign-up form via a pop-up: from 1-2 sign ups a day they rose to 12-15 – still tiny numbers, but nonetheless a potent percentage increase.
Usability Geek
However, it’s important to not go overboard. Too many pop-ups too often can irritate users, damage your brand, and cause them to avoid visiting your website. In fact, Google began penalizing sites with obtrusive pop-ups last year. Tread carefully.
[Users] will thank you…if you work in a pop-up that elucidates rather than obfuscates, that prioritizes their needs rather than your conversion desires.
You may need to play the long-game, but judicious use of pop-ups and, as always, a focus on usability, will win users’ respect and ultimately, their loyalty.
Usability Geek
The moral of the story: use pop-ups, but use them wisely. Don’t abuse the goodwill of your readers.
Why Holler Box in particular?
Hopefully, now you understand the usefulness of pop-up/modal forms. But why use Holler Box in particular? One word: simplicity. Here at MailPoet, we’re big on being simple. While our plugin is no doubt powerful, its greatest strength is its lack of confusing menus, buzzing buttons, and menus-within-menus-within-menus.
Ultimately being successful online is about good content, and WordPress is all about content. We wanted to make it as painless as possible to get your blog posts to your readers.
Q&A with MailPoet, the WordPress email newsletter plugin, on GoDaddy.com
So, when we see an easy-to-use WordPress plugin that integrates with MailPoet, we get excited. Holler Box is a dead-simple freemium plugin that virtually any MailPoet user can make use of. According to our statistics dashboard, only about 1% of our users are using Holler Box. We think that it should be at least 10%! Now, let’s walk through setting up Holler Box with MailPoet.

Step 1: Download and install
Naturally, the first step is to download and install the Holler Box plugin. You can find it on the WordPress Plugin Repository. If you need extra features and support, you can purchase Holler Box Pro on their website.
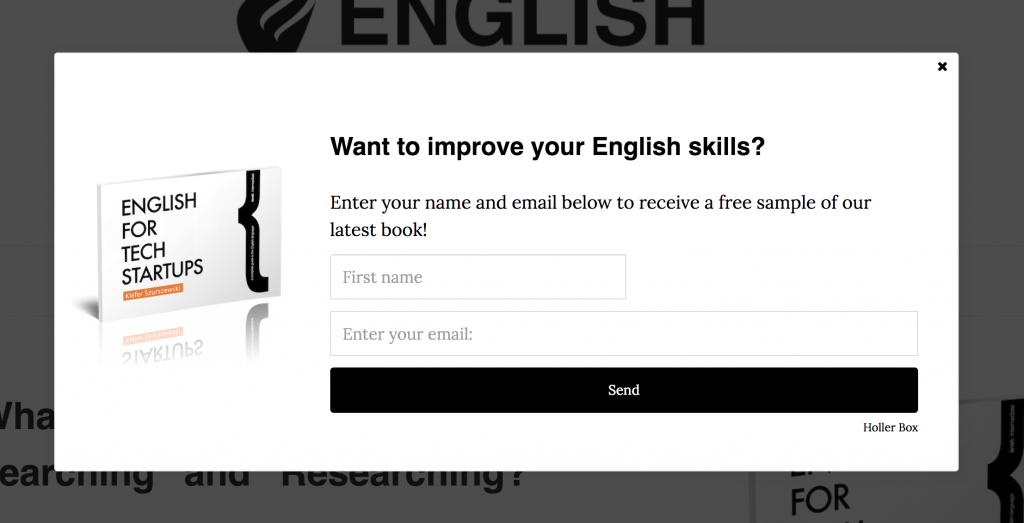
Step 2: Setup and design
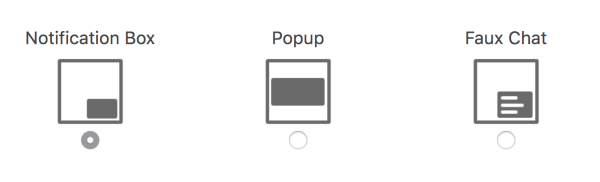
After you install the plugin, create a new box on the Add New Box page. Add your title and description and choose the type of box. While the standard “pop-up” is the standard choice, a “notification box” can also work well, as it won’t obscure the content on the page. “Faux Chat” is also a choice, although we prefer the other two options. When in doubt, go with a “notification box” – it’s less intrusive but still effective.
Nothing irritates a user more than being interrupted while reading your content. Remember: the goal of good content is to build an audience. You can’t build an audience if you don’t let your readers read your content.

Step 3: Adding MailPoet
Now, let’s tie in MailPoet. Under Display select Show email opt-in. You’ll then be presented with a number of options. Click the first drop-down box and select MailPoet (and not MailChimp!) Then, choose a list.
While you can use an existing list, we recommend creating a new one specifically for the pop-up. Why? Because your pop-up should be specific! It should be tailored to the pop-up format – don’t just copy and paste the same email campaign from your sidebar or footer widgets.
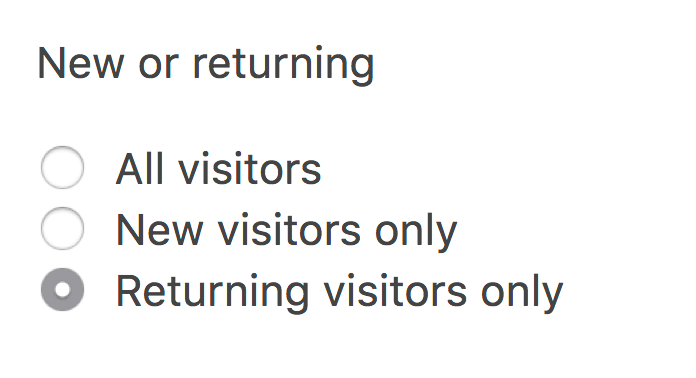
Under the advanced settings, you can customize how and when your box will appear. Generally speaking, we recommend only displaying the “default” box to returning users and not every user. Otherwise, they may become fatigued with the constant pop-ups, especially if this is the first time they’re visiting your site.
Likewise, set the delay to be at least 10 seconds – no one likes a pop-up that appears immediately.

Tips and tricks
And that’s it – Holler Box is now installed on your site. While the plugin may not be as powerful as some other WordPress options, it’s dead-simple to use and (most importantly) works with MailPoet in only one click. Now’s let’s review a few tips-and-tricks that you might find useful.
Set a pop-up for a specific page
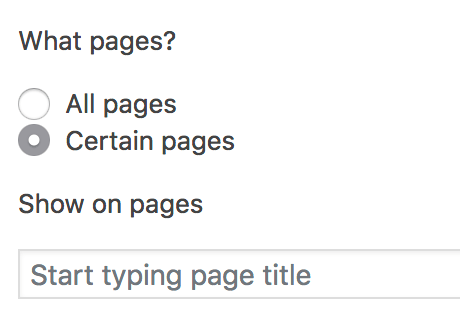
Want to make a pop-up display only on a particular page? It’s easy in Holler Box. Simply select Certain pages under What pages? and choose the page (or pages) that you want the pop-up to appear on.
We recommend creating as many customized pop-ups as possible. Rather than having one generic pop-up for your entire site, create an individualized one for each particular page. For example, the pop-up on your “Features” page should highlight the benefits that your product offers, while the pop-up on your “About” page should feature a personal message and encourage readers to personally interact with you and your team.
Create mobile-specific pop-ups
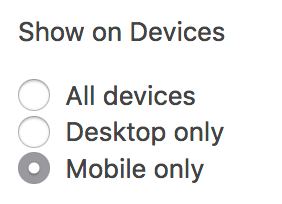
It’s important to always remember that your readers will access your page from a mobile phone or tablet. While it may seem irrelevant to the pop-up, it’s actually very important to pare-down the text for a mobile audience.
As such, you should create a specific pop-up for mobile devices. To do this, select Mobile Only under Devices. Remember to create another form for desktop web browsers.
Display the pop-up when users are about to leave
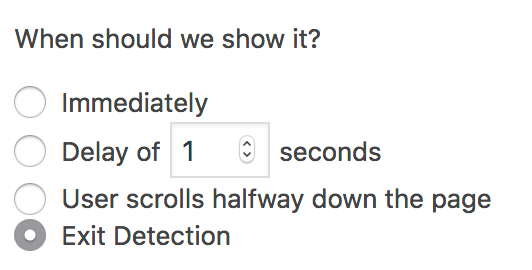
One of the most effective times to display a pop-up is when the user is about to close the page. Typically, this means they are scrolling up toward the “X” on the tab at the top of the browser. Generally speaking, this type of pop-up is considered “too needy” and can irritate your users. However, if you frame the pop-up as something helpful (and not as something whiny and needy) it can still work well.
In Holler Box, you can set a pop-up to appear when the user is about to leave. To do this, simply select Exit Detection under When should we show it?
What do you use subscription pop-ups for? Do you use Holler Box or another plugin? Let us know in the comments!
Finally, want to know more tips and tricks for improving your signup forms and capturing more emails? Check out our definitive guide on improving your signup forms.


thank you
anytime!
Personally, I absolutely hate “exit-intent” pop-ups. “Needy” is a good word for them. They’re the Internet version of panhandlers. I’ve heard the same opinion from other people I’ve talked to. Maybe they work, but a lot of things that work for marketing are really, really annoying. And some of them are just insulting. When my option for closing the pop-up is something like “No, I don’t like saving money,” that’s not going to do anything other than make me cranky.
Great article. How well does Holler Box work with PolyLang in multi-lingual web sites? Thanks,
nice guide :). Loved it
Not a comment but a question. Do we have the ability to add reCAPTCHA blocks to these forms? It looks great, I’d love to try Holler Box but that’s my concern.
You inspired me to give it a try! And I just tried to add a Holler Box to our site but the option for Mailpoet doesn’t show up. Is Holler Box compatible with Mailpoet 2?
Hello,
thanks for your explanations, could be a good choice.
I have the same question as Barbara as I cannot managed link Holler Box with mailpoet (I use mailpoet 2).
Hi, unfortunately HollerBox is currently only compatible with MailPoet 3. Sorry!
Hi, unfortunately HollerBox is currently only compatible with MailPoet 3. Sorry!
Simple efficace, sans prise de tête, j’adore …
Votre newsletter et vraiment intéressante, bravo pour votre travail …
********************************************************************************
Simple effective, without making head, I love …
Your newsletter and really interesting, congratulations for your work …
Just what I was looking for, great collaboration Mail Poet and Holler Box!
Hi,
a debt of gratitude is in order for your clarifications, could be a decent decision.
I have an indistinguishable inquiry from Barbara as I can’t oversaw connect Holler Box with mail poet Best Regards
https://sdub.org/good-tinder-bios/
I am currently using Rainmaker and Icegram for popup. The problem is it won’t allow a redirect in a new tab for my lead magnet (Healthy Meal Guide). So, it’s basically worthless as far as keeping a person on the site after they subscribe.
Does Hollerbox allow a new tab to open when a person enters their email?
Thank you! Dyana
I got the same issue with MailPoet and Hollerbox after entering the email it does go to another tab o page.
Do you resolve it ?
Can’t find any mailpoet in holler box option
Holler doesn’t seem to work with MailPoet anymore: I installed Holler, setup the connection to Mail Poet, selected a list for the users to join – so everything should be good to go. The box shows up on the page, users can enter their email-adress, the box shows a success message after sending – but then nothing happens. No mail to the user (double opt in), no new entries in the lists. Am I missing something?
Also: I would like Holler to show the form I created for joining the newsletter, not just a simple email-field.
Your help is very much appreciated.
Kind regards, Michael
Thanks for the guide. You saved me.
Love mailpoet :)
Trying to do my first popup using Holler Box I get no choice of type of box and when try to save I get this …
Updating failed. No route was found matching the URL and request method.
I am using Mailpoet 3. Am I doing something wrong?
This article needs to be updated. Holler Box was sold and the instructions to integrate are no longer accurate. While still a great plugin, its integration is different.
It actually no longer integrates FREELY with Mailpoet, only the paid subscription allows this. They now leave you with a bare minimum of one email marketing integration, “Groundhogg.” Which belongs to the new owner. SMH.